Dropped sub-mini tool on blade

Collapse
X
 
  • Filter
  • Time
  • Show
Clear All
new posts
  • Frede
    Member
    • Feb 2022
    • 36

    Dropped sub-mini tool on blade

    A friend gave me sets of Crown and Ramelson carving tools so I decided to try my 1st carving. Unfor I dropped the smallest Ramelson gouge bending one edge of the tip and I'm unable to fix it.

    I've been building furniture for 25 yrs....hand cut dovetails etc. I have a drawer full of strops, whetstones, diamonds and papers used for my chisels/plane plates. I can sharpen any chisel/plate shave sharp but failed getting the gouge fixed. I even ordered a whetstone for gouges but the slots are wrong. If I'd dropped a chisel, I'd start a new edge at 180 grit and go up which is what I tried with the gouge....no luck

    I absolutely LOVE carving and plan to continue doing it but it seems sharpening carving is quite different than what I'm used to with flat tools. Any tips on fixing the small gouge? Thanks!
  • DiLeon
    Senior Member Hawaii
    • Jun 2009
    • 8017

    #2
    First, there are a lot of ways to sharpen gouges, I suggest you look into several methods. One tip is bent which means structure failure in the bent area?...can you bend it back with a weakened area is questionable? I have had gouges fall onto the floor which is cement...., they never bent but the edge rolled a little or chipped. I am wondering if it is a bad tool with a failure in the metal depending on how much of the tips is bent? Because I can not see the damage....but if it is just a micro bent edge then it sounds like you may have to file off the whole top of the chisel and then proceed to sharpen the gouge from the start. Back to the desired shape. This takes time and patience and a learning curve. There are lots of Youtube videos on how to sharpen gouges and next how to strop gouges properly. Watch them all.

    I have one damage gouge, not sure how it got a chip...but worked on it for a whole hour yesterday and she still is not cutting right after resharpening the whole edge ...it is going to take some more time, and effort on my behalf. I know one thing my carpenter tools sharpening is fast not needed much. my woodturning tool needs a totally different method than my carving tools....my carving tools take a lot of patience and trial. There are people on here who can sharpen fast and easy. I am not one of them.

    Also in the future. I recommend using a better brand of tools ...they sharpen more easily and stay sharp longer and I have yet to see a bent edge on them no matter what happens to them. I had a chisel that got caught in a grinder wheel that broke and threw the chisel across the room she was swiss made not dent, bend, or roll. as she bounced off the walls and landed chisel side on the cement .she was good to go. A lot can be said for safety gear ...in oh dam rare moments.

    When learning to sharpen all of us does it differently, so get lots of methods, research, and opinions and go to the ones you think will work for you.
    . Explore! Dream! Discover!” aloha Di

    Comment

    • Frede
      Member
      • Feb 2022
      • 36

      #3
      Originally posted by DiLeon View Post
      First, there are a lot of ways to sharpen gouges, I suggest you look into several methods. One tip is bent which means structure failure in the bent area?...can you bend it back with a weakened area is questionable? I have had gouges fall onto the floor which is cement...., they never bent but the edge rolled a little or chipped. I am wondering if it is a bad tool with a failure in the metal depending on how much of the tips is bent? Because I can not see the damage....but if it is just a micro bent edge then it sounds like you may have to file off the whole top of the chisel and then proceed to sharpen the gouge from the start. Back to the desired shape. This takes time and patience and a learning curve. There are lots of Youtube videos on how to sharpen gouges and next how to strop gouges properly. Watch them all.

      I have one damage gouge, not sure how it got a chip...but worked on it for a whole hour yesterday and she still is not cutting right after resharpening the whole edge ...it is going to take some more time, and effort on my behalf. I know one thing my carpenter tools sharpening is fast not needed much. my woodturning tool needs a totally different method than my carving tools....my carving tools take a lot of patience and trial. There are people on here who can sharpen fast and easy. I am not one of them.

      Also in the future. I recommend using a better brand of tools ...they sharpen more easily and stay sharp longer and I have yet to see a bent edge on them no matter what happens to them. I had a chisel that got caught in a grinder wheel that broke and threw the chisel across the room she was swiss made not dent, bend, or roll. as she bounced off the walls and landed chisel side on the cement .she was good to go. A lot can be said for safety gear ...in oh dam rare moments.

      When learning to sharpen all of us does it differently, so get lots of methods, research, and opinions and go to the ones you think will work for you.
      Thanks for the advice. I have a few jeweler's files so I'll give them a try.

      The strop I'm using is shop-made from an old jacket. It's leather attached to hardwood with double-sided tape. This has been working well with the other minis....it's a soft surface so the minis sink in a bit causing the leather to wrap around. This seems beneficial as 30 passes with green paste brings them back to sharp. I either stumbled onto a great method of stropping or I'm doing it all wrong lol. I've also tested laying a piece of the leather over the gouge sharpening stone that is not the correct size and that also seems to work. I'm winging it big time.

      I agree sharpening flat tools is a whole different world. I've watched 20 videos on sharpening gouges but I prob need to start with a larger gouge. It takes a magnifying glass to see the edges on these mini tools.

      Comment

      • Randy
        Senior Member
        • Nov 2016
        • 4413

        #4
        Depending on how far back the bend is you can regrinded the cutting edge by hand if you do not have a grider. I personally would do it by hand on a small goudge. With a grinder you can over heat and loose the temper in the steel. I have used a course diamond stone to remove the damaged area and square the end. Then with a veriety of diamond and other stone recut the cutting edge. It is not fast but it will get the job done. My experance with Ramelson is like Di's. Not a bad tool but did not hold an edge well. You might consider looking at the tools you use the most and as you can up grade those, hold the ramelsons as your back up. In plam tools I am very happy with Drake. Mallett tools I have Pfeil Swiss made and Auriou. Those are just my choice there are other good tools to choose from.
        We live in the land of the free because of the brave! Semper Fi
        https://www.pinterest.com/carvingbarn0363/

        Comment

        • Eddy-Smiles
          Super Moderator
          • Feb 2007
          • 12380

          #5
          Just one word of advice Frede!...... "Persistence!" The first time I attempted to repair a gouge it was less than a rousing success but since that time with a couple of more repair jobs I gotten better....not perfect mind you, but better!

          Comment

          • Frede
            Member
            • Feb 2022
            • 36

            #6
            Originally posted by Randy View Post
            Depending on how far back the bend is you can regrinded the cutting edge by hand if you do not have a grider. I personally would do it by hand on a small goudge. With a grinder you can over heat and loose the temper in the steel. I have used a course diamond stone to remove the damaged area and square the end. Then with a veriety of diamond and other stone recut the cutting edge. It is not fast but it will get the job done. My experance with Ramelson is like Di's. Not a bad tool but did not hold an edge well. You might consider looking at the tools you use the most and as you can up grade those, hold the ramelsons as your back up. In plam tools I am very happy with Drake. Mallett tools I have Pfeil Swiss made and Auriou. Those are just my choice there are other good tools to choose from.
            Thanks that makes sense as there's 3-4 that are my "go to" at least for my first carving. I think I may have jumped in at a bit too high of a level with my first piece as it's a bit intricate for a beginner. At any rate I'm determined. It's almost embarrassing to say how much time I have in this....prob 20 hrs.
            You do not have permission to view this gallery.
            This gallery has 1 photos.

            Comment

            • Randy
              Senior Member
              • Nov 2016
              • 4413

              #7
              Originally posted by Frede View Post

              Thanks that makes sense as there's 3-4 that are my "go to" at least for my first carving. I think I may have jumped in at a bit too high of a level with my first piece as it's a bit intricate for a beginner. At any rate I'm determined. It's almost embarrassing to say how much time I have in this....prob 20 hrs.
              It will all come. I started doing woodspirits in walking sticks. I would take days to carve what I can now do in hours. you learn the wood and the tools, then what cuts when and where. If there is a carving club in driving distance make the trip. You learn so much frome talking to and watching those who know how to do what you want to learn. I did not have group then but found some good dvd's actually the first ones were VHS videos. I like them be couse I could play and stop and play over and over untill I got it. I still go back to some of them when I am going to do somthing I have not done for a long time.
              We live in the land of the free because of the brave! Semper Fi
              https://www.pinterest.com/carvingbarn0363/

              Comment

              • DiLeon
                Senior Member Hawaii
                • Jun 2009
                • 8017

                #8
                Originally posted by Frede View Post

                Thanks that makes sense as there's 3-4 that are my "go to" at least for my first carving. I think I may have jumped in at a bit too high of a level with my first piece as it's a bit intricate for a beginner. At any rate I'm determined. It's almost embarrassing to say how much time I have in this....prob 20 hrs.
                Do not count the hours....count what you are learning... a smile. I do not believe in instant success...it is the matter no matter how long it takes me ...I am going forward and learning how to do this. Do not quit. No matter how long we are wood carving we are always learning new things it is a part of the process. Oh yea I use Dockyard mini gouges ...I do not have much trouble with them and they are not much to keep sharp...just stropping. They used a lot as I do heavy detail work. Also, a magnifying glass helps when carving small details.
                . Explore! Dream! Discover!” aloha Di

                Comment

                • Tom Ellis
                  chipchaptom. Washington
                  • May 2009
                  • 8673

                  #9
                  Frede, Did you stand the tool 90 deg and flatten the end of the tool past the damage. Then start from scratch and work it down to a fresh new grind. Should be doable on the minis. Use finer grits, and go slow, Then strop to a sharp edge. Good luck, and carve safe.
                  If I took the time to fix all my mistakes, I wouldn,t have time to make new ones.

                  www.spokanecarvers.com

                  Comment

                  • Claude
                    Super Mod Louisiana
                    • Nov 2005
                    • 17009

                    #10
                    If the gouge with the bent corner is Ramelson, give them a call. I remember reading somewhere that they replaced one that was bad. From your description, it sounds to me as if the gouge did not have correct tempering. Instead of bending, the corner should have snapped off, if it was hardened and tempered properly. I'd suggest sandpaper taped to something flat like a smooth tile or piece of glass. Work up through the grits from, say, 220 up to 1500 or so, then strop. I've done this on a couple gouges that I dropped. I push and pull the gouge, rotating it at the same time, on the 220 to get it to the correct bevel and shape. Then on succeeding grits, I only pull the gouge, rotating as I pull. Try to lock your hand/arm at the correct bevel angle as you do it.

                    Claude
                    My FaceBook Page: https://www.facebook.com/ClaudesWoodCarving/
                    My Pinterest Page: https://www.pinterest.com/cfreaner/
                    My Instagram Page: https://www.instagram.com/claudeswoodcarving/
                    My ETSY Shop: https://www.etsy.com/shop/ClaudesWoodcarving

                    Comment

                    • DiLeon
                      Senior Member Hawaii
                      • Jun 2009
                      • 8017

                      #11
                      s-l1600 (1).jpgActually, if I was you, I would order a mini gouge from Dockyard 18 dollars rather than freak around with the bent blade. See if you like them better. When I posted I thought was a small gouge. But your using super small blades and shaped micro tools. ... to keep them sharp I made my own strop but you can buy them also helps keep those blades sharp. to consider shaping something that small forget it. 18 dollars is the cost of two big mac meals in Hawaii ...
                      Last edited by DiLeon; 02-08-2022, 05:26 PM.
                      . Explore! Dream! Discover!” aloha Di

                      Comment

                      • Claude
                        Super Mod Louisiana
                        • Nov 2005
                        • 17009

                        #12
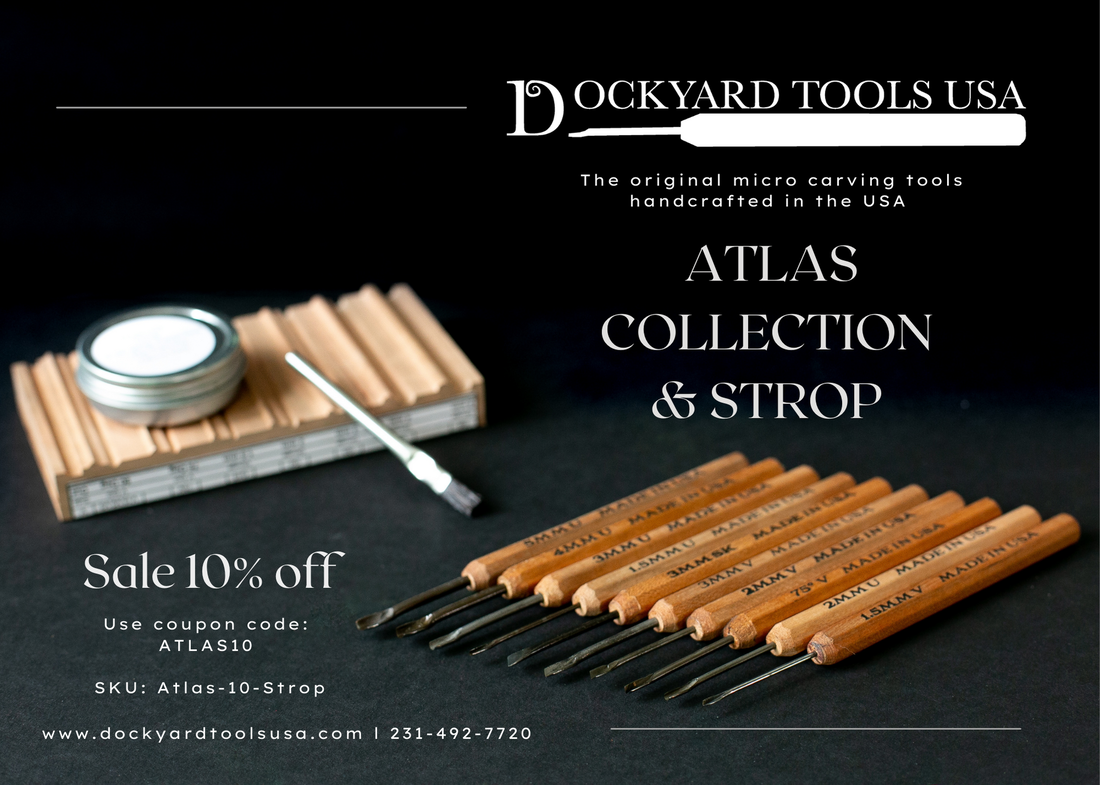
                        Dockyard Tools are the original micro carving tools in the wood carving industry. These tools are a must when it comes to detail carving work of any kind.
                        My FaceBook Page: https://www.facebook.com/ClaudesWoodCarving/
                        My Pinterest Page: https://www.pinterest.com/cfreaner/
                        My Instagram Page: https://www.instagram.com/claudeswoodcarving/
                        My ETSY Shop: https://www.etsy.com/shop/ClaudesWoodcarving

                        Comment

                        • pallin
                          Senior Member - Ventura
                          • Apr 2007
                          • 6280

                          #13
                          I question the proper tempering of a blade that would bend if dropped from working height. Next, consider the quality controls during manufacture. Were they going for anything more that saleable appearance? I wouldn't spend a lot of time trying to salvage a defective gouge.

                          Comment

                          • Brian T
                            Senior Member
                            • Jan 2011
                            • 12092

                            #14
                            Be honest with yourself. What do you think your time is worth? Replace the gouge with a good one so that doesn't disrupt the flow of the carving process.

                            Now you have a banged up one to fool with (my crisis was a 5/35 which arrived with a bent corner.)
                            The old standard process works very well.
                            1. Square off the end beyond the damage with an 80 grit carborundum stone and Pennzoil.
                            Just get the metal down to square. Crude will never show as you do it up pretty.
                            2. I sharpen from my knees, never my elbows, and pull strokes parallel to the bench edge only.
                            3. 10X loupe magnifier, very bright LED light and black felt marker to see the progress.
                            4. Shooting for 20 degrees, I'll work up through the grits to 1500 and stop.
                            5. No leather strops. Too soft. Office file cards, cereal box cardboard on a hard surface, scribbled
                            with green CrOx/AlOx. The adzes are easy to do with a tennis ball.
                            Brian T

                            Comment

                            • dave.keele
                              Missouri Ozarks
                              • Mar 2013
                              • 307

                              #15
                              Originally posted by Frede View Post
                              I absolutely LOVE carving and plan to continue doing it but it seems sharpening carving is quite different than what I'm used to with flat tools. Any tips on fixing the small gouge? Thanks!
                              Man and woman walks into my booth at crafts fair. Woman: You tried carving once, right? Man: Yea... cut myself twice in first hour, so gave it up. ...What's wrong with that picture?

                              In my opening remarks, during beginner classes, I tell students: it's my opinion that beginners quit carving for one of three reasons... all to do with tools:
                              1) they're using the wrong tool (wrong tool for the job, bad steel and won't hold an edge, etc.)
                              2) they're using the tool wrong (often leading to unnecessary cuts/stabs, etc.)
                              3) they're using a tool that's not sharp.

                              Learning to sharpen? My best advice: take a beginner class or find another carver and get some one-on-one, hands-on instruction. Numbers 1 and 2 above come easy for most folks with woodworking experience.... number 3, not so easy. I start beginners off using sand paper in various grits (see pics) followed by a leather strop charged with compound.

                              Ask 10 carvers how to sharpen and you'll get 11 answers. In order for me to learn new things, it must make sense to me. With all the methods and advice you'll get, I'd suggest you pick the one that makes the most sense to you and learn it.

                              I use a powered sharpener as described here: https://shellknobwoodcarvers.weebly.com/projects.html

                              I sharpen all my carving tools on it, including the micro ones. Advantages: I can sharpen tools very quickly; since I'm holding the tool, and the shaping/honing wheels do the moving, I can better control the angle and pressure applied to the tool. Disadvantages: HIGH learning curve; I can ruin a tool very quickly thru annealing of the steal. Frequent dunks in water is required when using the emery wheels.

                              Using leather for strops have never been a problem for me, it's just a matter of learning how to use. Too much pressure and wrong angle will cause edges to round over. The key here is technique. I can round an edge on cardboard or MDF just as easy if I roll the edge.

                              Good luck and don't give up. The time you spend learning to sharpen your tools will be well spent.
                              sharpening 13.jpg sharpening 14.jpg
                              ....Dave
                              Old carvers never die... they just whittle away.
                              www.shellknobwoodcarvers.weebly.com

                              Comment

                              Working...
                              X